Ozobot Harvester
Combines, tractors, and other farm equipment are all important when it comes to the process of harvesting – collecting the edible or valuable parts of a crop from wherever it is growing so that it can be processed, stored, or sold to a consumer. In this activity, you will build a combine powered by a little robot called an Ozobot to collect styrofoam or cotton balls – the ‘crops’ – scattered around as quickly and effectively as possible.
2021, developed by Alex at SCI-FI Science Camps.
Intended Audience: Grades 3-5
Duration: 75 minutes
To Do in Advance
Complete the background activity.
Opening Hook
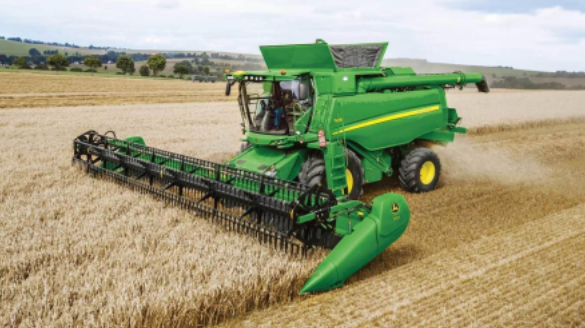
Now it is your turn to build a combine powered by a little robot called an Ozobot. Your combine won’t need to complete the tasks of threshing and winnowing, all it needs to do is collect the Styrofoam or cotton balls that will be scattered across your field as quickly and effectively as possible. When you are designing your combine, think about how you want your Ozobot to be attached. The combines you are probably used to seeing look something like this where the combine mechanism and tractor that drives it are all one big machine.
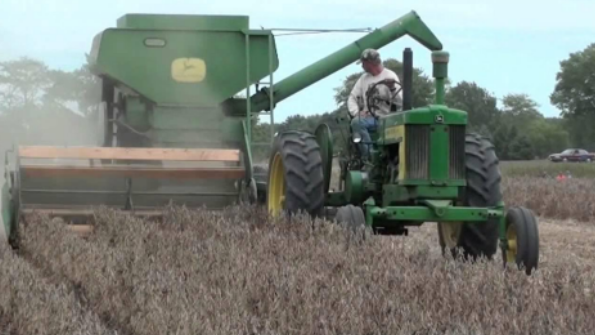
Some of the first combines ever produced didn’t work like this though. Instead, they were large machines that would be pulled along behind an ordinary tractor like the one below.
You can use whatever method you want to connect your Ozobot to your combine, but you will only be allowed to put one piece of tape on the Ozobot. Like many things in engineering, both methods will have advantages and disadvantages so think carefully before deciding which one you want to use.
Once you have designed your combine you will need to tell the Ozobot what to do. This will be done by programming it with an iPad or computer. You will want your harvester to work all by itself once you have set it down in the field. In other words, you will make it “autonomous”, meaning it doesn’t need a human’s help to do its job. Today, almost all combines require a driver, but engineers are currently testing new autonomous combine designs to make the lives of farmers a little bit easier.
Activity Procedure
- Design a harvester/combine using the cardstock that can be practically attached to the Ozobot (won’t slow it down or stop it)
- The harvester/combine can only be attached by a small piece of tape
- Students will code their Ozobot to harvest crops from a small rectangular field
- Go to the following link on a web browser:
- https://ozoblockly.com/editor?lang=en&robot=bit&mode=2
- There are different levels of commands ranging from basic to very advanced, with variables. The kids should only need at most the 3rd level, but they can probably use level 1 or 2.
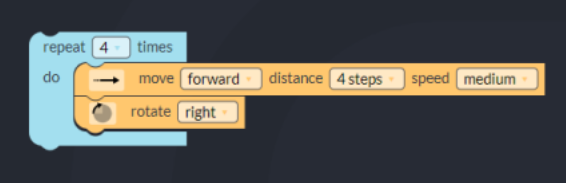
- The user interface is similar to that of the Microbits or Scratch programs. Drag and drop code blocks in the order you want the code executed. Here is an example program which moves the Ozobot in a square shape in the right direction:
- Reset the Ozobot to a calibration mode (Hold power button till it blinks white) and then set the designated area on iPad screen or computer screen and press the button to transfer the code to the Ozobot.
- Ozo-Harvester must remove 90% of the crops to be considered successful.
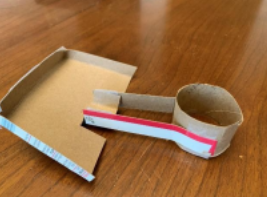
Here is one example of how a towable Ozobot harvester might look:
Reflection & Debrief
- What are some benefits of an autonomous harvester? What are some potential problems?
- Should we be trying to harvest more crops faster?
Extensions & Modifications
Extensions
- Students can go back and edit their combine if it fails and time allows
- Students can also try and use speed to harvest their crops more efficiently
- Test different types of tape to see which attaches the combine to the Ozobot best
Modifications
- Allow additional time or resources for younger grades
- Reduce the percentage of crops required to be ‘successful’ if students are having difficulties
- Spheros can be used in place of Ozobots