Activity Summary
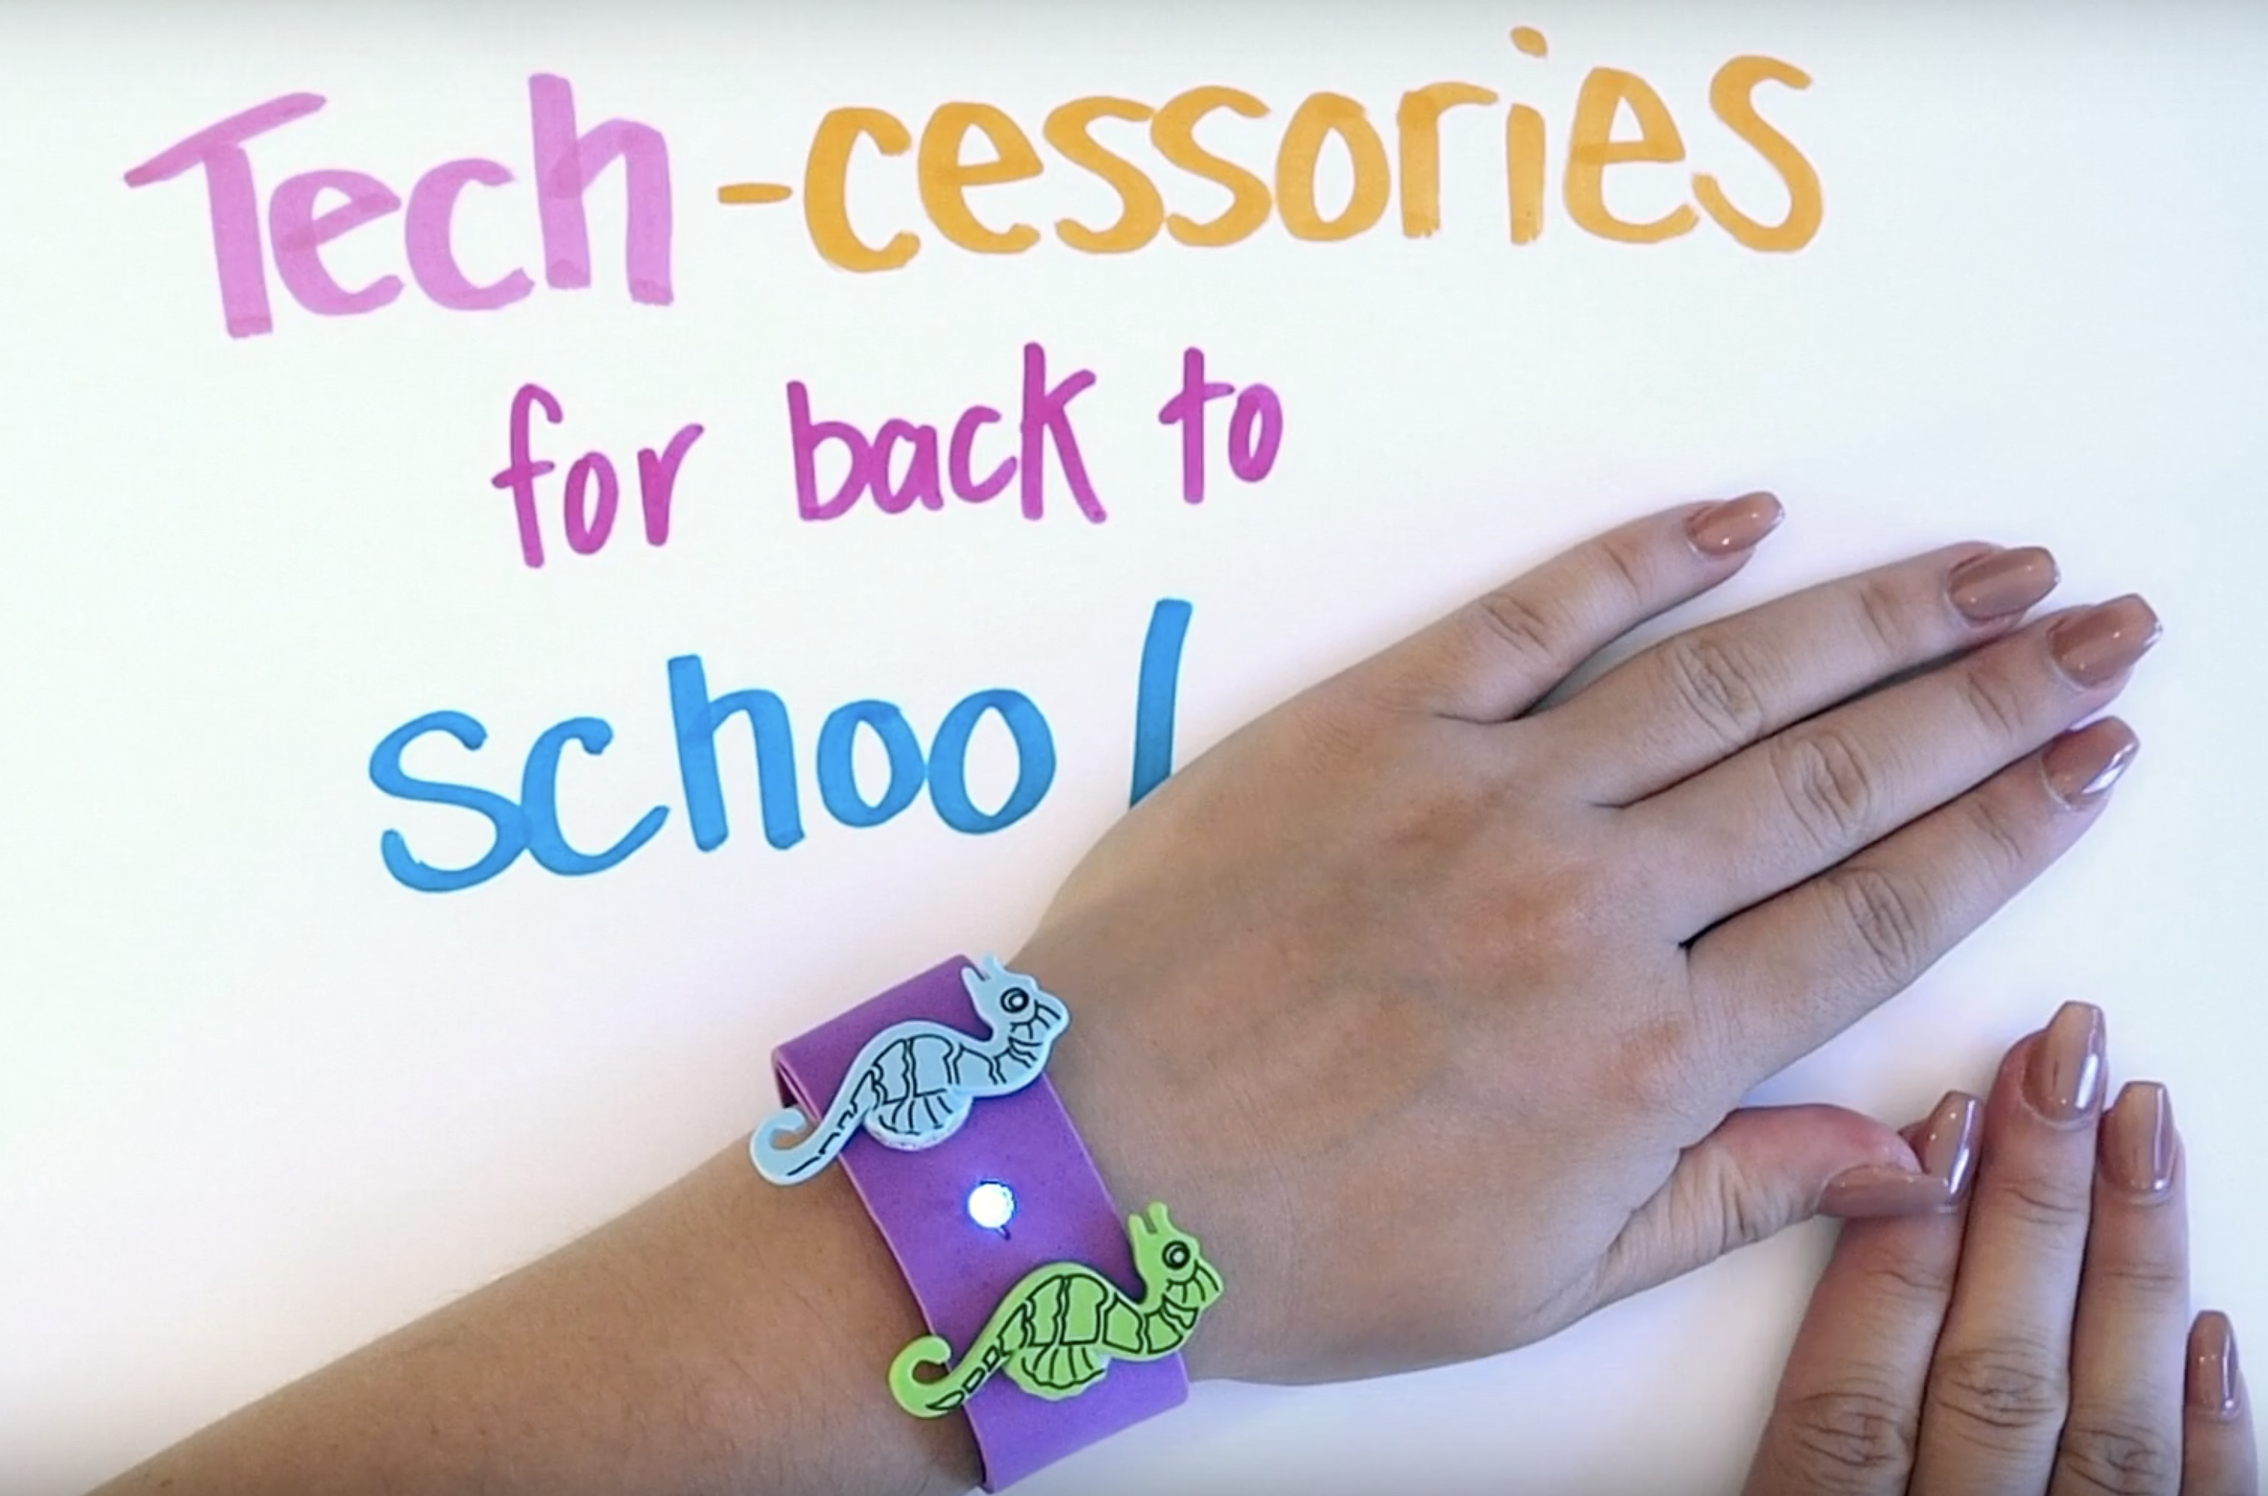
Time to tech-cessorize! In this activity, you can turn any plastic jewelry or accessory into light-up, wearable tech by creating simple electrical circuits.
Intended Audience: Grades 6-8
Duration: 45-60 minutes
Safety Considerations: Burn & Choking/Ingestion Hazard
Activity Procedure
Big Idea
Electricity is the energy that comes from the flow of electrons. Batteries are a power source that gives us a steady supply of electrons. Electrons travel along a closed loop or circuit, and prefer materials like metal and water, which are conductive and make travel easy for electrons! Electrons will power our LED.
In a parallel circuit, electrons flow from one end of an electron source (battery) down two wires (one positive and one negative). An output (like an LED) can be added anywhere along this surface that closes the loop and connects the circuit, giving energy to that output (lighting up the LED). Many outputs can be placed along the wires, each connection gives energy to the output. Parallel circuits allow you to give electricity to multiple outputs (like LEDs) using one battery.
To Do In Advance
- Assemble all your materials in one place, this makes building easier.
- Plug in your hot glue gun to let it warm up.
If possible, instructors can show a final product idea. Prompt students: how might this work? What knowledge and resources might be drawn on to create your own tech-cessory?
Section 1: Tech-cessories
- Using hot glue, glue foam paper over the surface of your accessory.
- Leave one end of the foam paper unglued, so it can be used as the battery pack.
- Draw out the lines of your parallel circuit.
- These lines should be close enough together that the LED fits in between but not so close that the two lines touch.
- Make one line of tape about an inch longer than the other (this will allow for your battery pack to connect to both sides without touching each other).
- Assign one line of tape to be the positive(+) end and the other to be the negative(-) end.
- Cut pieces of copper tape to the length of each of the circuit lines.
- Stick the copper tape down along the circuit lines.
- Stick the LED lights in the space between the circuit lines.
- Ensure that the positive end of the LED is touching the line of tape that you assigned to be positive.
- Ensure that the negative end of the LED is touching the line of tape that you assigned to be negative.
- Place the coin battery at the end of the circuit lines.
- Be sure to use the end of the foam paper that is not glued down to the accessory.
- Fold the end of the foam paper together so that the copper lines touch the opposite sides of the coin battery.
- Secure the battery in place by attaching the binder clip or paper clip overtop of the battery.
- Test to make sure that your lights work.
- In the event that they do not, troubleshoot by checking the following:
- Make sure that the battery is in the right way (positive touching the positive line of copper tape, negative touching negative).
- Make sure that the two lines of copper tape are not touching
- Make sure that the LEDs are all facing the correct way (positive touching positive, negative touching negative)
Decorate your accessory in any way that you choose!
Reflection & Debrief
- Remove the battery when you are not using the accessory, this will prolong the life of the battery and prevent the battery from overheating.
- Participants can peer and self assess their creations with others in their class. This can lead into a further inquiry of ideating a plan and possibly marketing it.
Extensions & Modifications
Extensions
- If micro:bits are available, here is a good lesson.
Modifications
- Participants can create multiple lights or different pieces of clothing, or work collaboratively to create something else.
- If you have a limited amount of materials, participants can work in pairs.